Hosts & server details
Save connection details, organize your fleet and understand what “Last verified” actually means.
Before you start
- Use ShellMate 3.3.0 and select the intended account or workspace.
- Confirm the host/provider access and permissions required by this guide.
Meet your workspace.
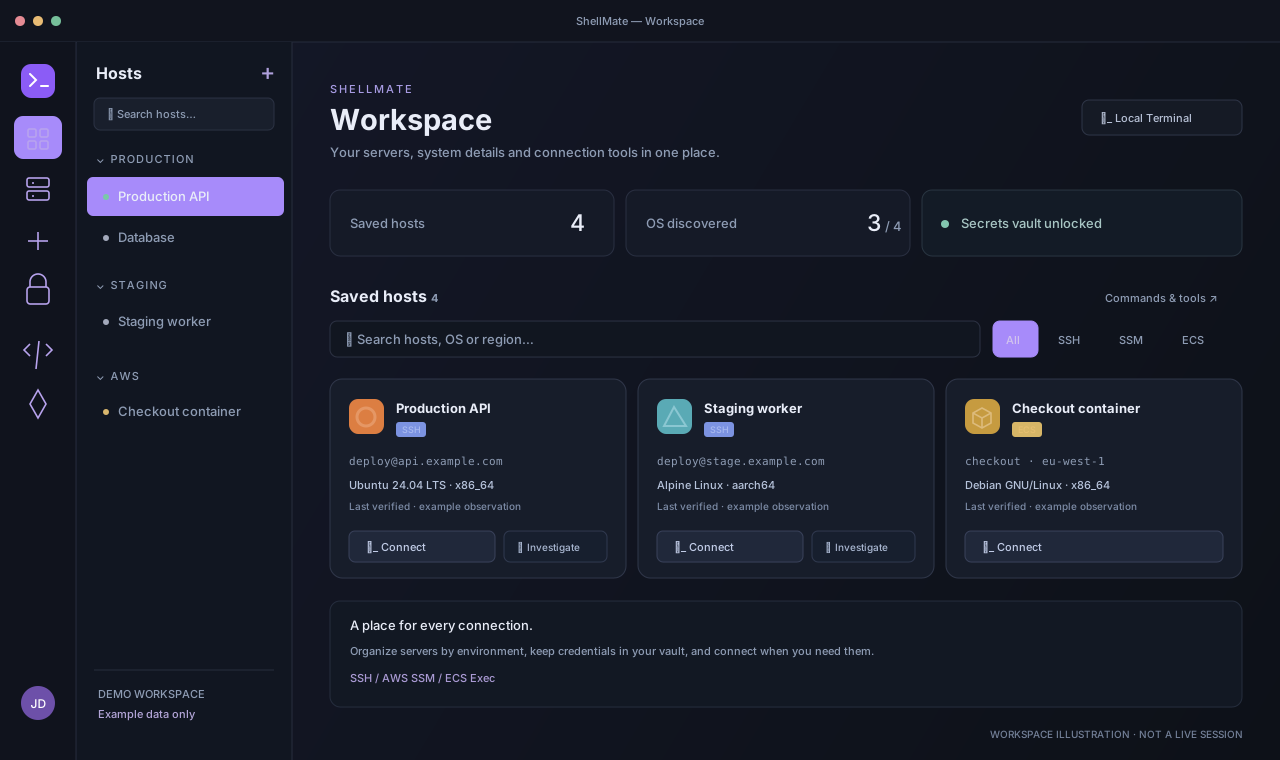
Find your hosts
Open Hosts in the navigation rail. Use the host drawer and workspace search to find the server you need.
Read the complete walkthrough
- Find your hosts. Open Hosts in the navigation rail. Use the host drawer and workspace search to find the server you need.
- Unlock the vault. Use Vault to manage your saved credentials. Unlock with the supported key flow before connecting with an encrypted credential.
- Read server details. The OS label and Last verified time describe a saved observation from a supported connection. Expand details for more information.
- Open a session. Choose Connect on the intended host. Complete authentication and wait for remote verification before treating it as connected.
Watch the 32-second overview Silent video · captions available
Recorded from the illustrated desktop and example My Page walkthrough. No audio or live infrastructure. Download video.
Video text transcript
- Desktop workspace: Find your hosts. Open Hosts in the navigation rail. Use the host drawer and workspace search to find the server you need.
- Desktop workspace: Unlock the vault. Use Vault to manage your saved credentials. Unlock with the supported key flow before connecting with an encrypted credential.
- Desktop workspace: Read server details. The OS label and Last verified time describe a saved observation from a supported connection. Expand details for more information.
- Desktop workspace: Open a session. Choose Connect on the intended host. Complete authentication and wait for remote verification before treating it as connected.
- My Page: Open Hosts. Choose Hosts in the My Page sidebar to browse the host catalog available to your account.
- My Page: Narrow the list. Use the group filter or search to find a server. The browser displays saved metadata; it does not open an SSH terminal.
- My Page: Inspect observations. Expand a host’s OS details. Last verified is historical, and Not detected yet means a supported connection has not saved an observation.
- My Page: Manage your account. Use Settings for profile, security and language preferences, or Support for help. Other navigation items depend on your role and plan.
Let’s walk through it.
- 01
Create a host
In desktop Hosts, choose Add Host and give the server a recognizable name. Set its address, port and remote user.
- 02
Choose authentication
Select a saved Vault credential, or another authentication option offered by the host form. For a private network, configure the jump host and its own credentials.
- 03
Organize and connect
Assign a group that matches your environment or customer. Save, then connect. Host access and session permissions still apply to shared entries.
- 04
Inspect server details
After a supported verified connection, inspect the OS label and expand its details for available version, architecture and kernel information. My Page > Hosts shows the saved observation.
What success looks like
The saved host uses the intended transport and identity. After a supported connection, available server details appear with a Last verified timestamp.
Good to know.
Historical, not a health monitor
Last verified is the time of a successful observation. It is not a live online indicator. A new host shows Not detected yet until a supported connection collects details.
What gets detected
SSH, ECS Exec and standard SSM sessions can collect system information. Custom SSM documents and port forwarding do not provide automatic OS discovery. Missing fields mean information was unavailable.
Privacy of server details
Display metadata such as OS and architecture is stored as ordinary host metadata. It is not secret vault data. Raw probe output and connection credentials are excluded from that metadata.
Host field reference
Name is a display label; address is the DNS name or IP to connect to; port is the SSH server’s listening port; group organizes the entry. The identity username is an account on the remote server, not your ShellMate sign-in email. Use a DNS name without an https:// prefix for an ordinary SSH host.
Identity versus service credential
The default host identity signs into the remote machine. A database credential or a sudo/su service credential authorizes a different operation after connection. Selecting a database password does not make it the SSH login password. Keep identities named clearly when a host supports multiple logins.
Jump hosts
Create or select the bastion entry, then select it as the target host’s jump host. The bastion and destination can require different accounts and credentials. Confirm that the destination is reachable from the bastion and that you are allowed to access both entries. Changing the target address does not remove the need for the jump path.
Editing an existing connection
Edit the saved host, review the identity and transport settings, and save. Reconnect to use changed connection details; do not assume an already open session has moved to the new server. Keep an existing known-good session available if your operational process allows it.
Understanding the badges
SSH, SSM and ECS identify the transport, while the OS label identifies observed system information. A container hint or BusyBox userland label is additional evidence, not a substitute for the OS. Not detected yet is expected for a new entry or unsupported discovery path.
A few common questions.
Why are server details missing?
Reconnect using a supported session. Restricted shells may reject startup commands. Custom SSM commands and port forwarding intentionally do not claim OS discovery.
Why can’t I see a team host?
Ask your workspace administrator to check your host/group access and session-start permission. A role name alone does not guarantee access.
What if the server fingerprint changes?
Check whether the server was rebuilt or its host key deliberately rotated. Verify the new identity with the server owner before accepting it. A familiar display name is not sufficient proof of server identity.